UI Widgets can be used for a wide variety of gameplay features in Unreal Engine 5. Whether you want to have an interaction pop-up on a door or button, a menu in front of a mesh or a name above a character. In this article we will go over how you can make immersive UI Widgets by rendering them in 3D World space.
Let’s start by creating a UI Widget Blueprint using a texture of your choice. In my case I imported an image of a health icon as a texture. After importing a texture, you can create a Widget Blueprint to draw the image on the screen. The widget should end up looking like this:
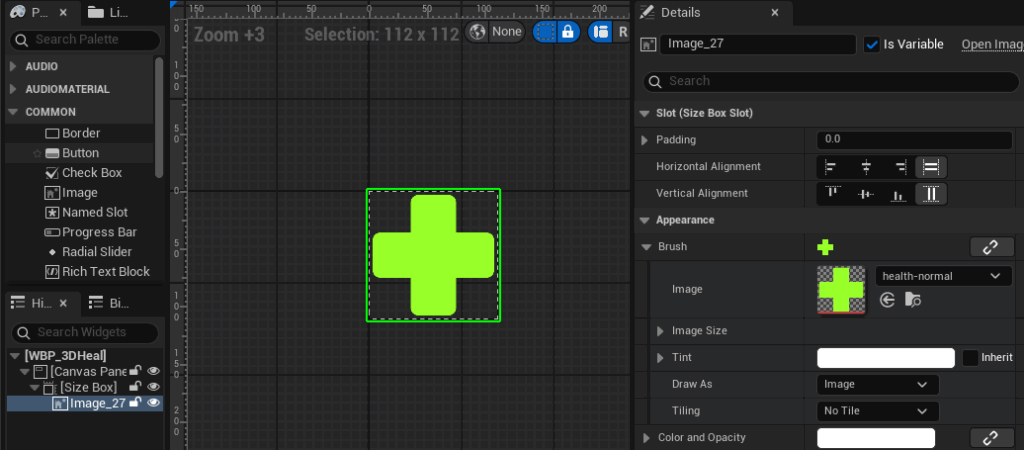
The first widget that we will add is the Canvas Panel. After that we can add a Size box and set the size to something small like 112×112 pixels. Now we can also set the Widget size to Desired on Screen at the top right in the viewport. After that we can add an image widget to the Size Box and set the texture under Appearance. The image size can be left to the original size, such as 512×512 pixels.
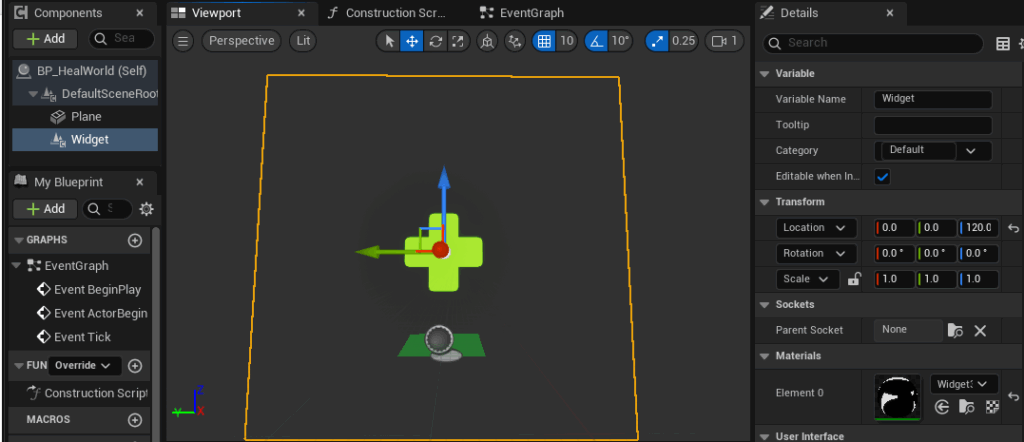
Now let’s create a Blueprint Actor with a Widget Component and a simple Plane Component to indicate our Actor in the Map. When we put it all together it looks like this:
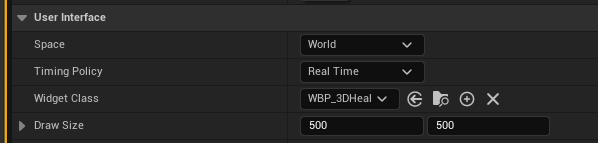
In the User Interface panel we can set the space to World and assign the Widget class to the Widget Blueprint we just created. The draw size can be either left as is or changed to the same size as the widget (i.e. 112×112 pixels):
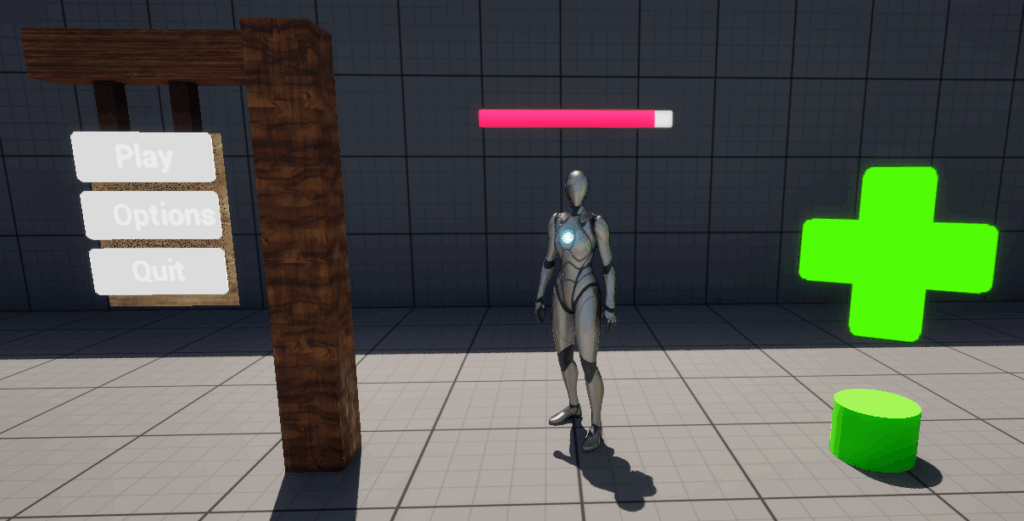
When we place the Blueprint in a map and play, this is the result:
As you can see the widget now appears in 3D World Space and is rendered along with the environment. This is more immersive than a 2D widget rendered on the screen in 2D space. This can be useful to show animated or static widgets for a HP pickup or menu rendered on top of a mesh. The widget will also behave like any other mesh in the environment, so the player can block it or walk through it depending on the collision settings:
If we walk around the widget or rotate the camera we can see the backside, which might be a surprise:
By default the material and widget will only have one side and therefore simply not render anything behind the widget. What we can do to prevent this is enable Two Sided under the Rendering settings, but this may not work for every widget as it depends on the material in the elements slot. The result is therefore a black backside:
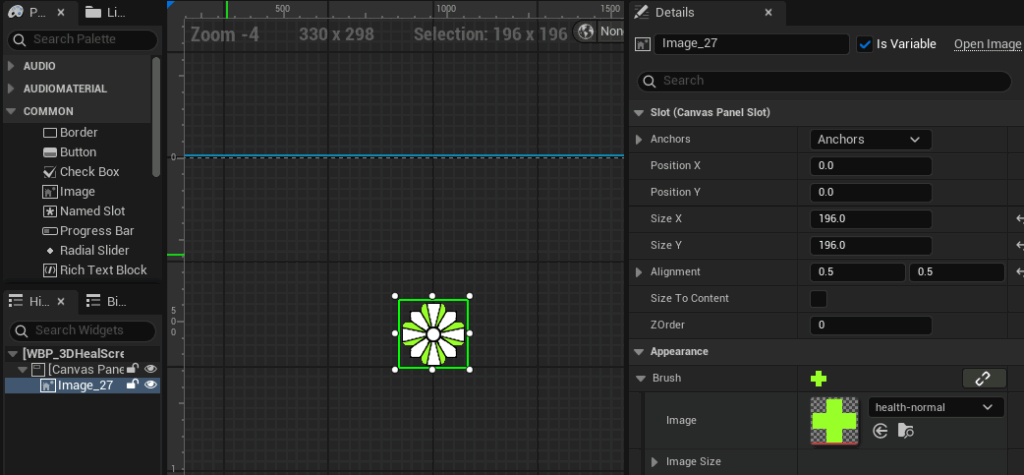
In this case the blueprint widget is still static despite being in 3D World Space. What we can do instead is make the widget follow the camera, in this case the third person camera. This can be great for widgets that indicate HP above an NPC for example. Let’s create a copy of the Widget Blueprint and change the resolution from Desired on Screen to Fill Screen in the top right of the viewport. Let’s also remove the Size Box widget and then change the X and Y size of the image widget to something slightly larger like 196×196 pixels. The result should look like this:
Now let’s create a copy of the Actor Blueprint of the World space widget for our new screen space widget. We can change the User Interface in the copied Actor Blueprint to set the Widget Class to the new Widget Blueprint. You can also play around with the draw size if desired (i.e. 500×500 pixels). The most important part is to set the Space to Screen. This will change how the widget is rendered on top of the world based on the location of the widget component from the perspective of the third person camera. This will have some interesting effects:
As you can see the widget is rendered at the location of the Blueprint Actor and faces the camera. The only issue is however that the widget is rendered on top of the world, so it will always block the player and any other UI behind it:
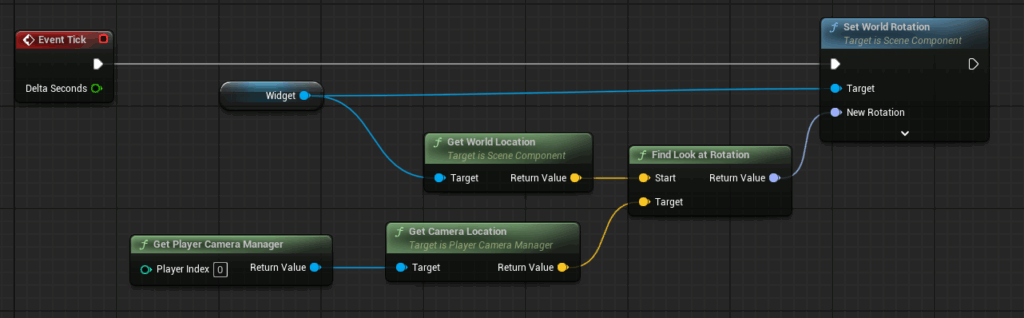
Another approach is to still have the desired effects of a 3D World space widget like in the first example, but with the logic of a Screen space widget that faces the camera. We can do this by copying the Actor Blueprint of the first widget and add a few nodes to the Event Graph of the Blueprint:
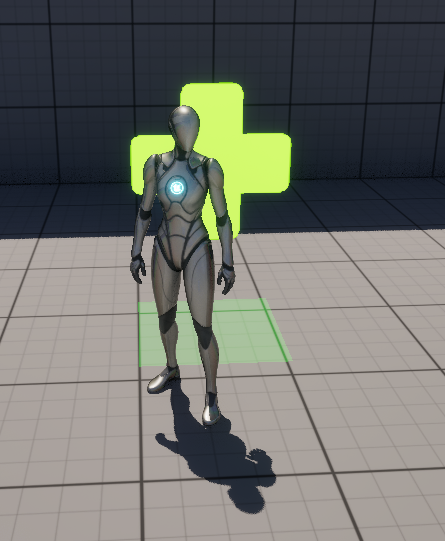
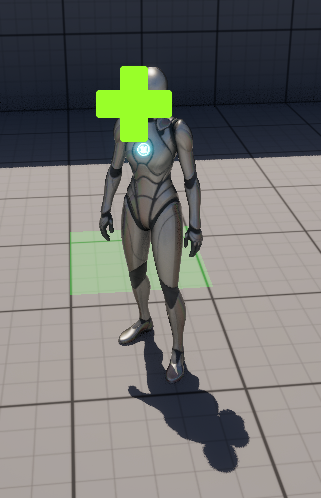
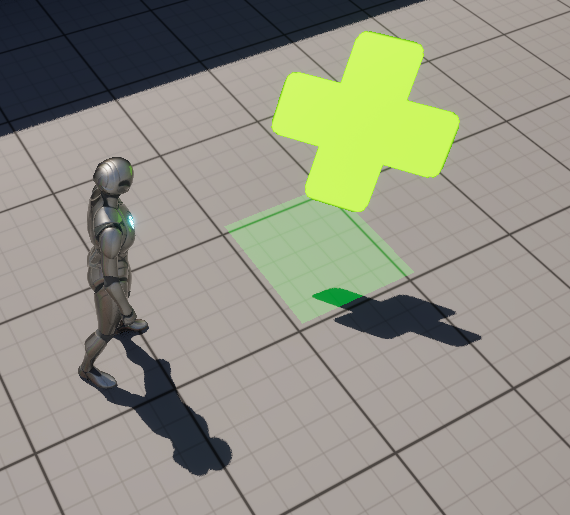
When we place the Blueprint Actor in the world we can see the desired effect:
However, due to the widget being rendered as part of the World, it will cast a shadow:
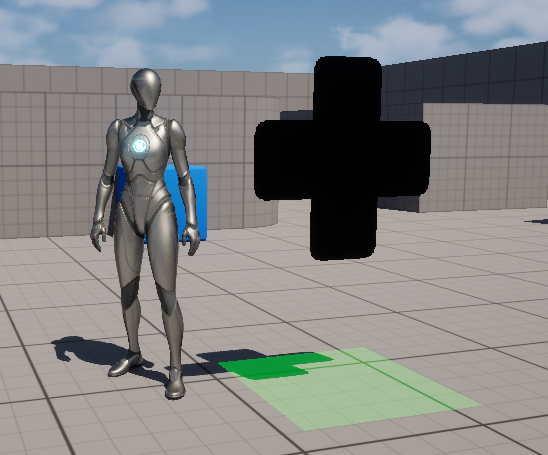
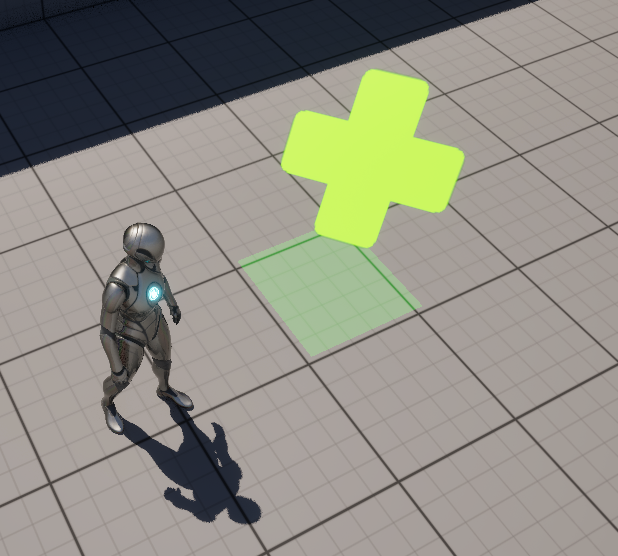
We can disable this by setting the Blend Mode to Transparent:
This will change the material in the element 0 slot from the default Widget3DPassThrough_Masked_OneSided to Widget3DPassThrough_Translucent. Now we get the desired results of all the previous examples without the shadow:
This is great of UI that should be part of the world instead of being rendered on top in 2D screen space, such as HP bars or UI prompts, as it is more immersive. The widget component can be attached to any actor or character Blueprint, so it can be more dynamic than the static actor shown above. You can also create other materials for the UI widget to create different effects besides just transparency.
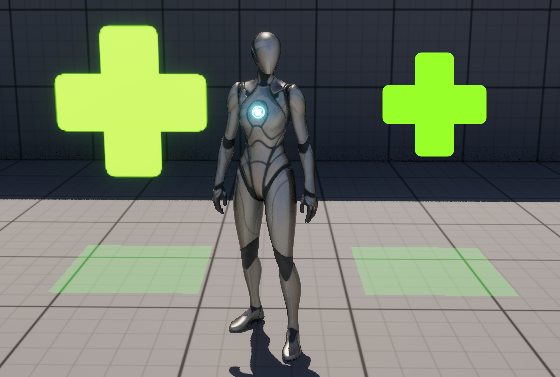
Lastly, while playing around in the editor you may have noticed that the sprites of the World space UI widget are rendered in a slightly different tone. This is due to the post-processing effects that are applied to the material and shader of the UI widget. If you want to retain a more accurate representation of the colors of the original texture, we can change some rendering settings and the assigned material for the UI widget. You can see the difference in tone between the World space and Screen space widgets below:
Let’s apply a few settings to match the tones more. Firstly, under User Interface and then Advanced on the Widget Component in the World space Actor Blueprint you can enable Apply Gamma Correction:

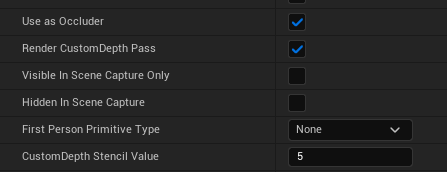
Let’s go to the Rendering panel and enable Render CustomDepth Pass and set the CustomDepth Stencil Value to something like 5:
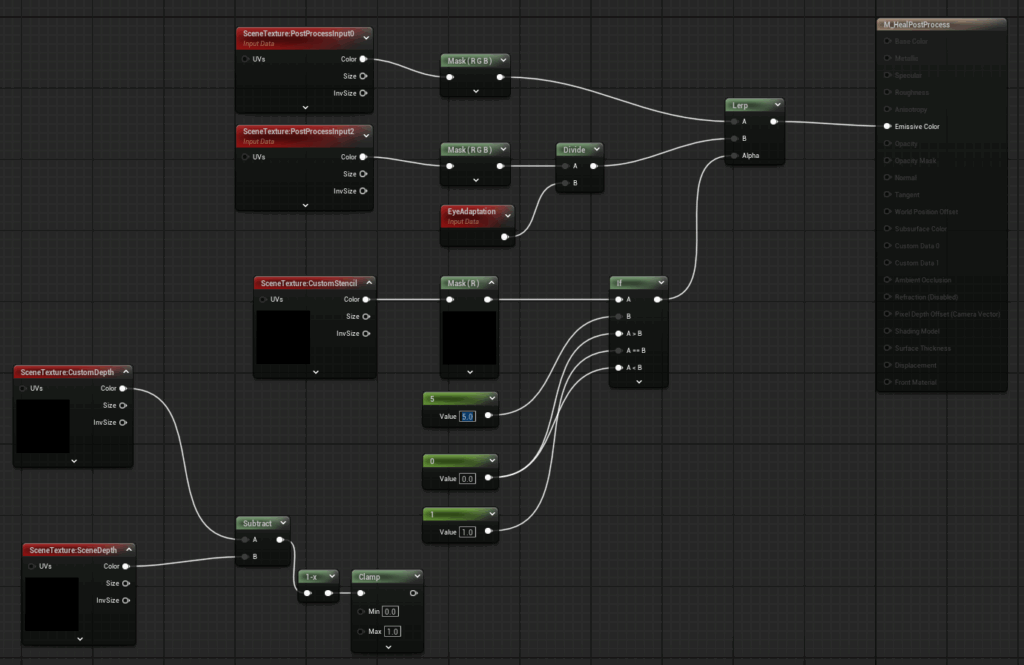
Now we can replace the existing material in the elements slot with a new material that uses the CustomDepth Stencil. In the new material we need to set the Material Domain to Post Process. The Blendable Location variable should be set to Scene Color After Tonemapping. The nodes in the material should look like this, with the constant value for B in the If node set to the CustomDepth Stencil Value:
To support the Stencil we need to enable this in the project settings under rendering by changing the Custom Depth Stencil Pass selection:

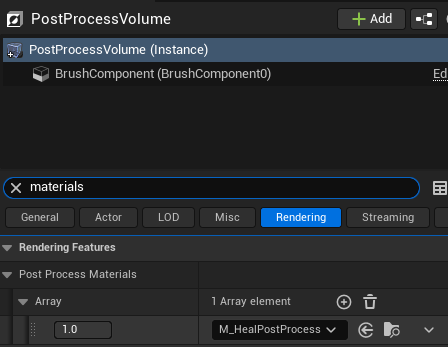
Then in the PostProcessVolume for the map with the 3D World space widget you can add the material:
Set the brush size (X, Y, Z) to something that is big enough to encapsulate the widget in the world, such as 2000. The last step to apply the Custom Depth Stencil Pass is to go to the Actor Blueprint for the World space widget and set the Blend Mode to Masked.
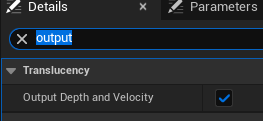
If we then open the material Widget3DPassThrough_Masked_OneSided and go to the Widget3DPassThrough material (visible in the Hierarchy), we can enable two settings, Output Depth and Velocity and Responsive AA, to further correct the tone to match the texture:
There now is a visible difference in tones after applying these corrections:
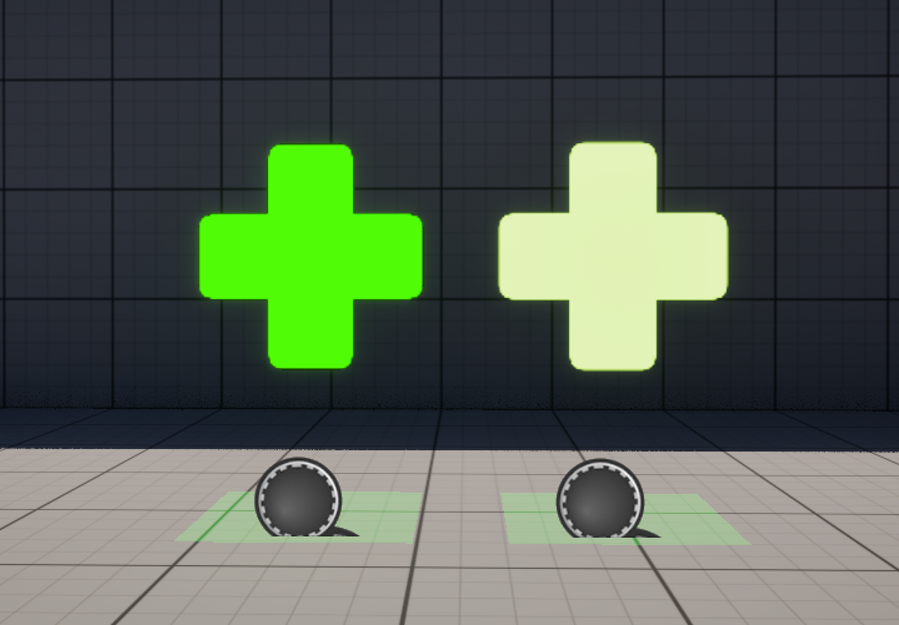
The left widget has our changes and the right one has the default settings and material.
Conclusion
We discussed 3 examples of rendering UI widgets in a more immersive way depending on the desired outcome. The final example shows a combination of World space and Screen space behavior to create a widget that faces the player while still being rendered as part of the environment rather than on the screen. With a few changes to the rendering settings and material we can also control the tone mapping of the textures for our UI Widgets. By changing the User Interface settings we also compared different results for one-sided and transparent UI Widgets, with 3D World space giving us the most control and immersion.