Games usually support more than one language, so it is important to keep this in mind from the beginning, because changing things later could be really time-consuming. Creating a localization ready game in Unreal Engine is fortunately really simple, you just have to follow one simple rule.
In order to make texts localizable by Unreal Engine the text must be picked up by the localization system. UE has multiple variable types that can be used for texts, but only one of them is localizable: FText, so it is important to use it for all user-facing texts.
When defining a localizable text from code, we also need to use the NSLOCTEXT macro.
FText MyText = NSLOCTEXT(“namespace”, “key”, “default text”);
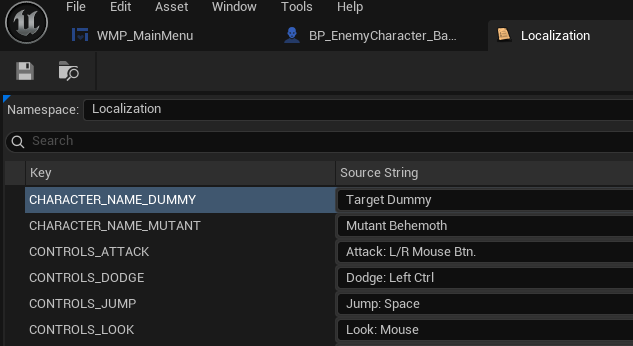
Game text can spread across many places in your project: UMG Widgets, Blueprints, other data, and C++ files, which makes it hard to find and change what is displayed in-game. To solve this problem, we can use a String Table and store key-text pairs in one place. Of course, you can have multiple String Tables to separate menu and dialogue texts, for example.
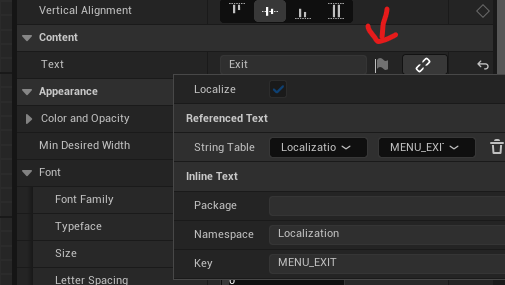
To use a value from a String Table, simply click on the small flag icon next to your FText type field in the editor and select your key, or use the namespace and key from C++ .
Localization
Unreal Engine has a built-in tool to handle localization, called the Localization Dashboard. Here, you can define many things for your project, such as what languages your project supports, what type of assets need to be scanned for localization, etc. For us, the default settings should be fine now.
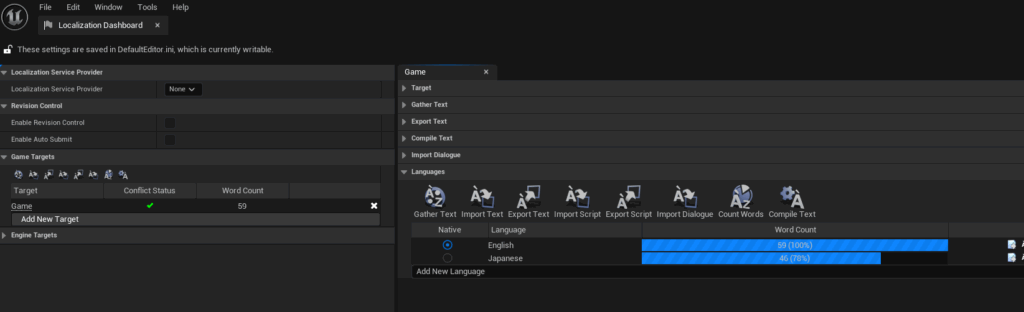
Clicking on the Gather Text button will start to scan the project and find all localizable texts, based on your settings. When finished, you will see the word count next to the default language. Gather Texts should be run regularly to find any newly added texts.
Add a new language, and click on the Edit translations for this culture (first icon in the Actions) to open the text editor for this language.
When done, save and close this panel, then run the Compile Text command to make texts available in the game.
Switching language in the game
To switch the game’s language, we can use the Set Current Culture node and enter the IETF language tag for the selected language.
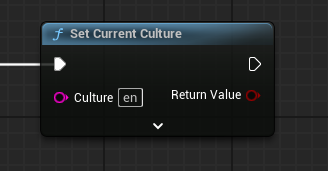
It is important to mention here that changing culture while running a game in the editor (PIE) has no effect on the game; the localization service is disabled. You have to run the game as standalone in order to make localization work.
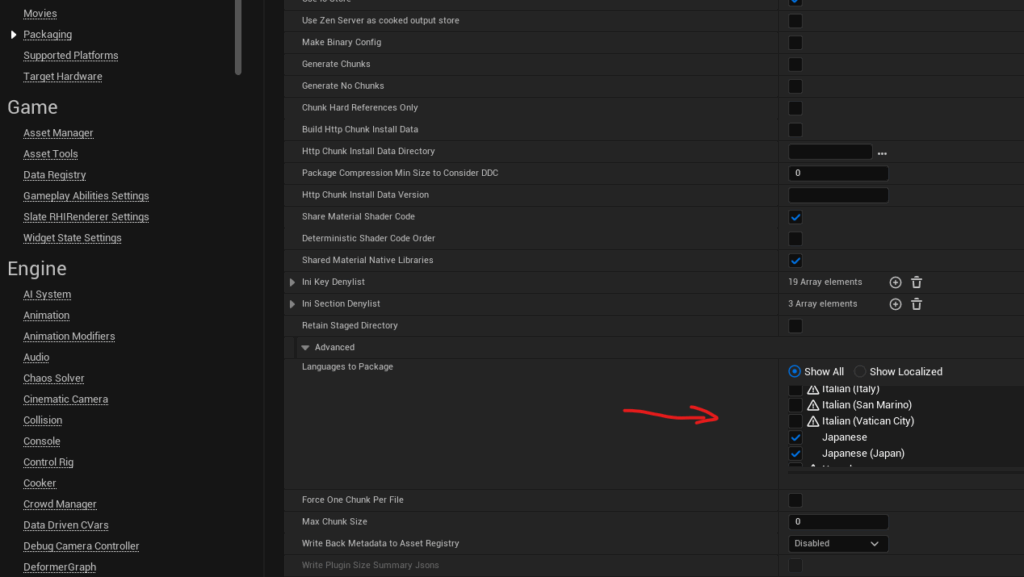
Furthermore, if you want to make a standalone build for your game, you need to set up the languages that you want to include in your build. This can be done in the Project Settings’ Packaging sub-menu, at the Languages to Package section.
Testing
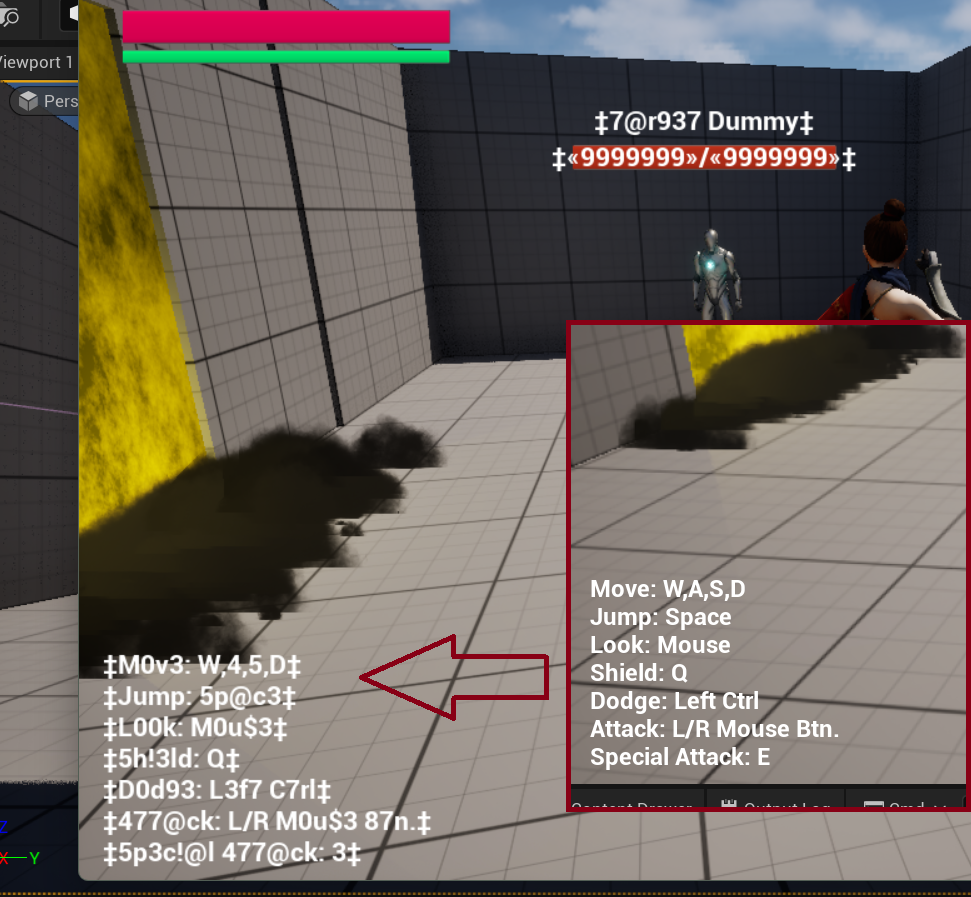
Even if you have not translated your game yet to any languages, you can test localization easily in Unreal Engine. Simply start the game with the “-leet” parameter, which will turn all texts into “leetspeak”, replacing some letters with numbers and symbols. You should see texts like “N3w G@m3”, “L0@d”, “C0nt1nu3”, etc.… Any text that is not transformed like this is not being picked up by UE’s localization system.