Recently, the Player State class in Unreal Engine 5 has gained more popularity online, especially when a project uses the Gameplay Ability System plugin. Since it’s part of the main classes of a game module, similar to Player Controller and Player Character, it’s good to get a grasp of the do’s and don’ts when using the Player State. Let’s therefore dive a bit deeper in today’s article.
The Player State lives in an array of APlayerState objects in the Game State. The Game State and Player States exist on both the server and clients when replication is enabled. The Player States have a unique ID and their order is consistent for each client as well. Player States are designed to hold player-specific information throughout the level that the Player State is assigned to.
This design makes it a great place to store data such as a score, HP and an online identifier, because the data is accessible to any client and also exists when the player character is not available or destroyed. Although there is a focus on replication, the Player State is also a good place to store data in an offline or singleplayer game. The Player State is tied to the current level, so if a level is switched the Player State will be destroyed. A way to keep the data and Player State is to use seamless travel or move the data to an object with a longer lifetime, like the Game Instance. The benefit of this is that the Player State has a clear use case and does not store data in levels where that is not needed.
Now that we’ve discussed where to store the data, let’s talk about what to do with the data.
One of the benefits of using the Player State is that it comes with some functionality out of the box. For example, when a player reconnects or travels to the current level, we can use seamless level streaming and copy or override properties to the Player State. If we check the APlayerState base class, which you will derive from when making a Player State class for your project, we can see plenty of properties already available to us:
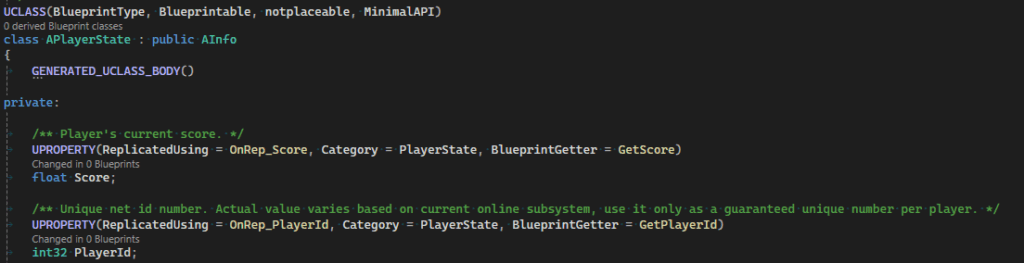
First we have the score and “PlayerId”. Although they are replicated, they are still accessible in a singleplayer game, also called a standalone game, without a server. Further down the class there are properties such as ping, session name and network address, which are more relevant to multiplayer games with replication. However, we also have virtual functions such as “ReceiveCopyProperties” and “ReceiveOverrideWith”. These functions can be used to handle and copy properties for a Player State when reconnecting to a game session, or when traveling to a new level. If we combine that with seamless level streaming, then we can keep the data consistent throughout the game.
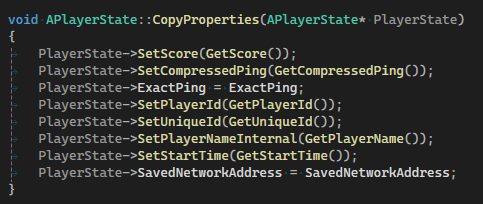
We can test this flow by overriding the “SeamlessTravelTo” function and calling “CopyProperties” to copy the properties to the new Player State in the next level:

The base class currently copies the following properties, but you can override the function to add more data too:
Other use cases for the Player State are respawning the player character with the right name, HP, and inventory, or binding a delegate to update the current HP for a UI Widget Blueprint for example. By using the Player State class you can also more easily move your project to a online multiplayer game by creating a Player State for each player, as the data can be easily replicated from within this class. You can also create a Player State for each AI controller or character, which would make it easy to manage similar data for multiple characters or let players take control of them.
Conclusion
I hope you now have a clear picture of the Player State and its use cases, because it is a well designed class with plenty of features for both singleplayer and multiplayer games. By using this class you also make it easier to expand or redesign your game, as the data is stored and accessed from one place within a level.