Introduction
My name is Szabolcs, and I work as a game programmer at SYNAPSE STUDIO.
In some cases, games need to spawn a large number of objects for a short time and then destroy them. The best example is “bullet hell” games, where both the enemy and the player shoot a huge number of bullets. Spawning and destroying actors is an expensive CPU operation, and constantly allocating and deallocating memory can lead to fragmentation.
In similar cases, we should use object pools to improve performance.
What is an Object Pool?
An Object Pool is basically a set of initialized objects that are kept ready to use rather than allocating and destroying them all the time. When we need an instance of the object, we just grab it from the pool and use it. After finishing using it, the object returns to the pool instead of destroying it.
To give a bit more specific example, let’s think of a “bullet hell” game. At the start, we spawn a large amount of bullet actors, then make them invisible and inactive, to initialize the pool. When the player or an enemy shoots, we are getting a bullet actor from the pool, activating it, and making it visible. After the bullet collides with something or is outside of visible range, we return it to the pool.
Simple Object Pool implementation in Unreal Engine 5 with Blueprints
In this article, I would like to introduce a simple implementation of Object Pools, using Blueprints.
Let’s create an Actor Blueprint class, called BP_PooledActor. This will be the parent class for all Actors that we want to place in a pool.
We need the following variables:
- InUse (bool) – this will tell us if the object is currently active and in use or not.
- LifeTime (float, instance editable) – how long the object should stay active before returning to the pool
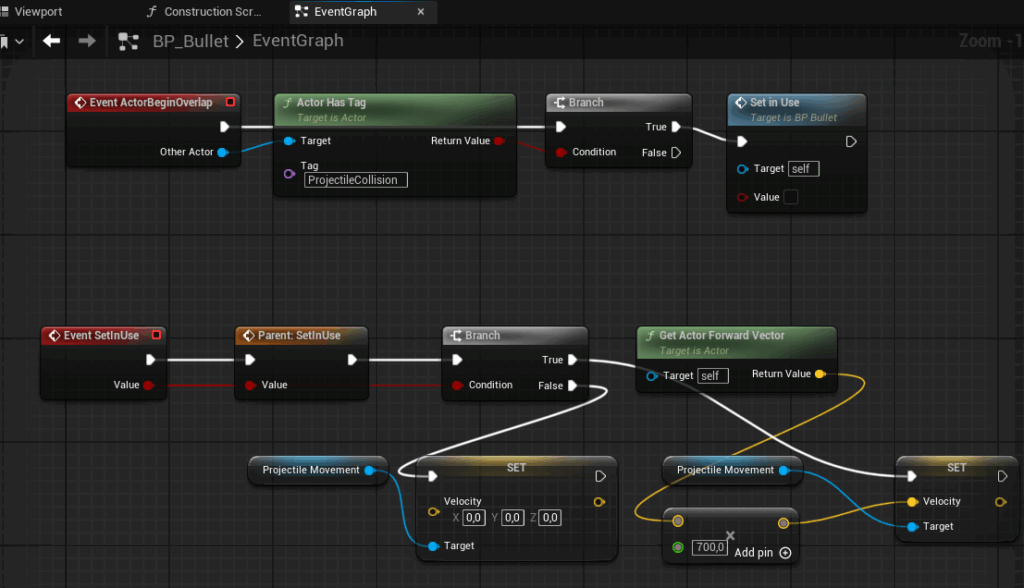
And create a Custom Event: SetInUse, with one input parameter: Value (bool). This function is supposed to activate and deactivate actor components and also start the timer for the LifeTime. What is important to handle here: Actor Collision, Hidden in Game, Actor Tick.
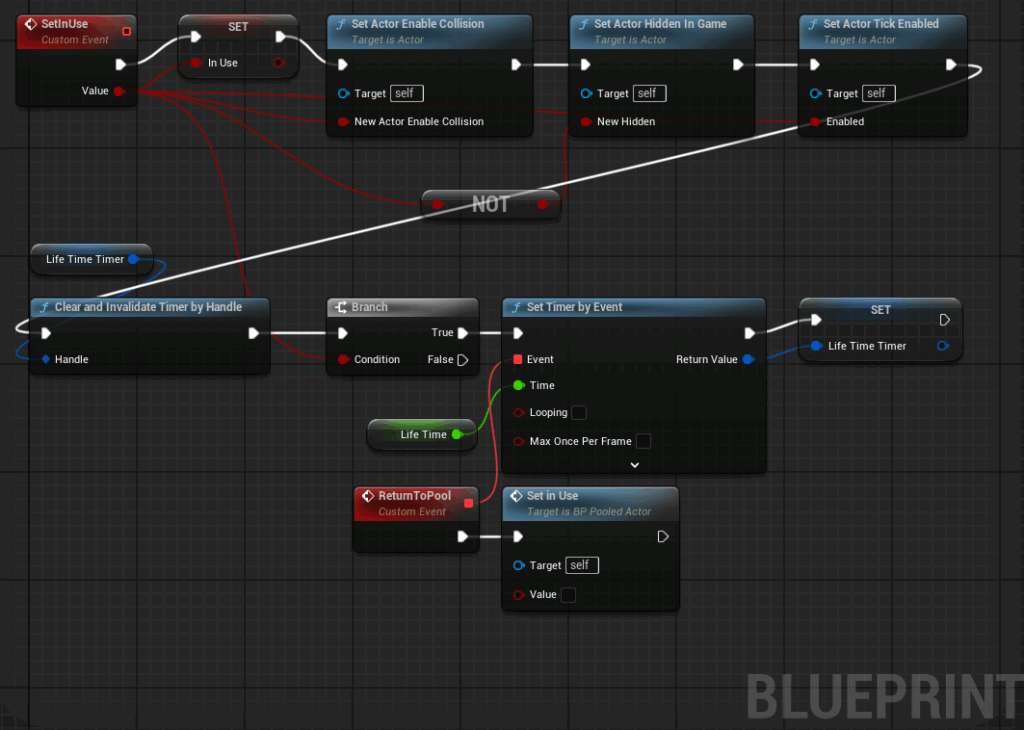
Call this event on BeginPlay to initialize it as inactive.
Now we have a parent class for the Actors that we want to place in a pool. Let’s implement the component that handles them. Create a new Actor Component Blueprint with the name AC_ObjectPool.
We need the following variables:
- PoolActorClass (BP_PooledActor, class reference, Instance editable) – this will define what type of Actors we are storing in the pool.
- PoolSize (Integer, Instance editable) – defines the size of the pool, how many items are getting allocated on start,
- ObjectPool (BP_PooledActor, Object Reference, array) – this array will store the pooled Actors.
Now we need some functions. First, one that returns the first available (not in use) Actor in the pool.
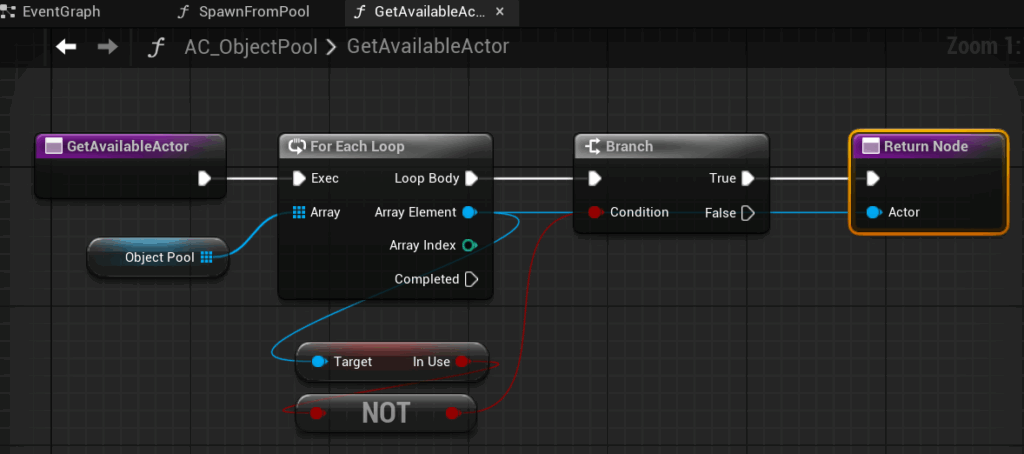
GetAvailableActor basically just iterates through the Object Pool array and returns when it finds the first Actor that has InUse = false.
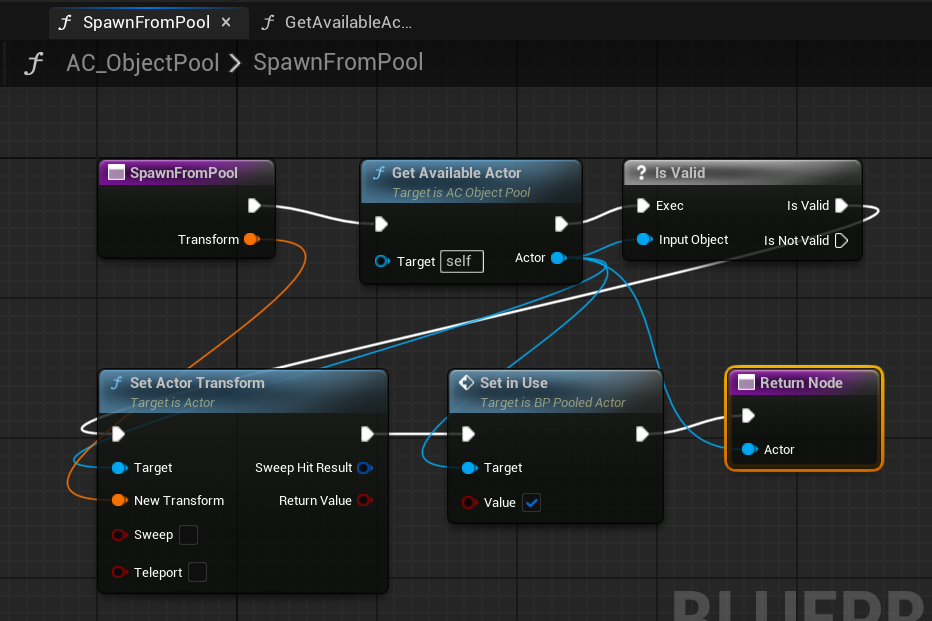
The next function is SpawnFromPool, which will replace the SpawnActor function when we want to spawn the object. This function will take a parameter to set the transform. The implementation is simple: use the previously created GetAvailableActor function, check if the return value is valid, and if yes, set the transform and change it to InUse state.
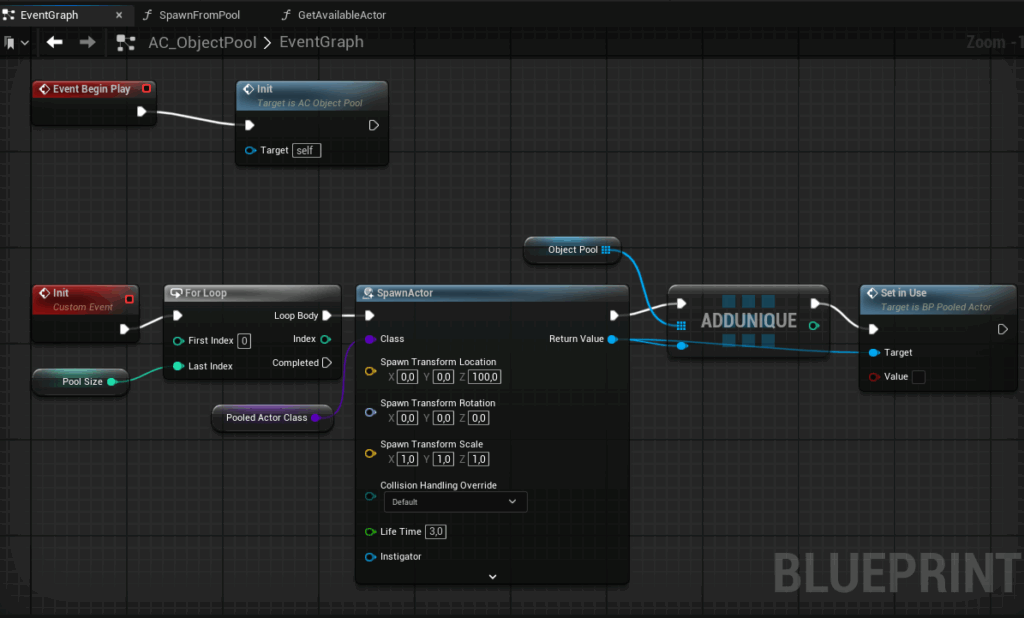
The last piece of the puzzle is to initialize the pool: use a for loop with the Pool Size, Spawn Actors of the PooledActorClass and insert them into the array. Make sure to call SetInUse on them with false.
Using the Pool
If you already have an Actor that needs to be pooled (for example, a bullet) change the Parent Class in the class settings to BP_PooledActor. If you are just creating it, inherit this class instead of Actor. Set the Life Time variable to something that makes sense for your case. This will make the Actor despawn after the set amount of time. Leaving the value on 0 will turn off the timer.
Override the SetInUse event, but keep the original functionality by calling the parent SetInUse. Handle all the enabling and disabling of your specific elements here (particle systems, sound, etc.). Call SetInUse with false to return the element to the pool, for example, when a collision happens.
The last thing that remains is to add our AC_ObjectPool component to the Actor that is spawning your pooled object, so, for example, the weapon or the player.
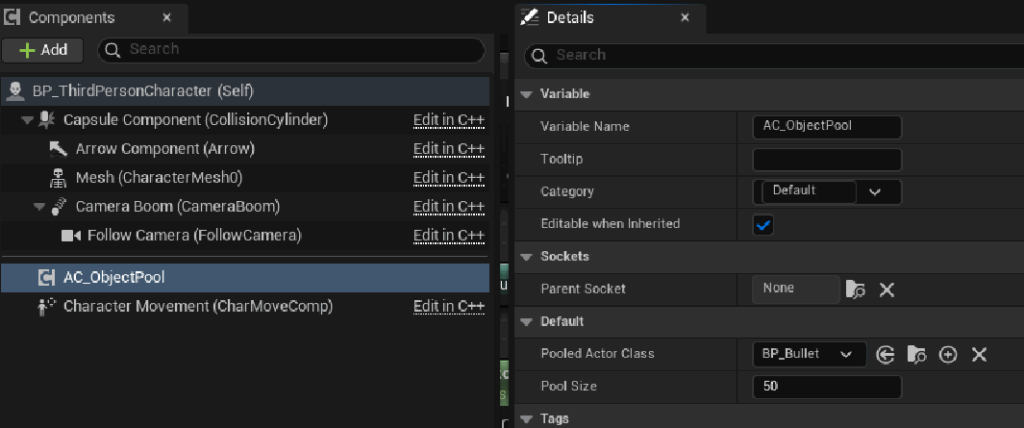
Set the Pooled Actor Class and the size of the pool to a number that makes sense. Be careful with setting a too large number as the objects are getting spawned on start and can take a lot of memory.
In your script, use the Spawn from Pool function of the Object Pool, instead of spawning new actors, and we are done.
If you did everything correctly, when starting the level, you should see your pooled object spawned at the start in the Outliner, but not visible in the game.

Conclusion
And that is all. Now we have a simple, reusable system for pooling Actors in UE5.
Of course, we could go one step further by implementing everything in C++, but I wanted to keep this quick introduction to object pooling understandable for everybody, not just programmers.